This workshop continues to show how to make the divided box with the lid being created using the botanical Shapeabilities expandable die. The measurements have all been worked out for you with the lid & the base being made using the self lined technique for a professional finish.
Part 2 will feature on how to make the dividing panel. The Melt Art project pan will used to melt the chocolate for the lollipops which make a fun addition to the project along with the UTEE necklace gift.
___________________________________
for Full Picture Listed Workshops for Easy Reference
Click here
_____________________
Click Below for a Printable A4 Worksheet
Green & Blue Necklace and Chocolate Box Workshop Part 2
~~~~~~~~~~~~~
Green & Blue Necklace and Chocolate Box Workshop Part 1
____________________
If you have a Facebook account
you can now follow Creative Expressions on FACEBOOK
Click here for the link
Great for latest information
_______________________
Shopping List
Grand Calibur Die Cutting Machine : WIZCAL
Ideaology Paper Collection Pad : Various Codes Available
Spellbinder Shapeabilities Expandable Botanical Swirls Die :WIZS5-154
Open Leaf Stamp : HCPC3545
White A4 Card : 40001 or Coconut Card : 40980
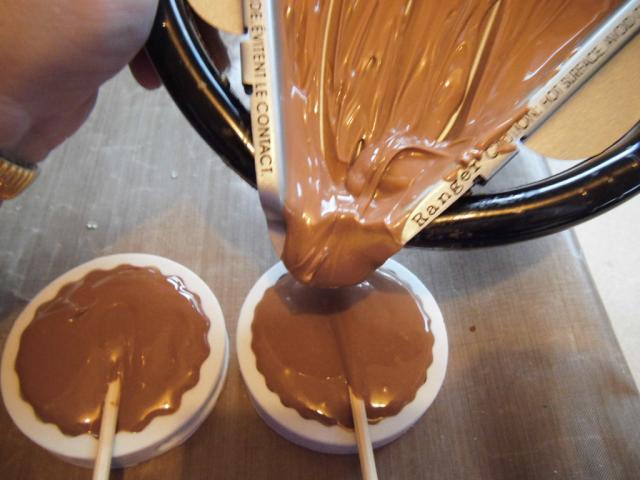
Tim Holtz Distress Dabber : Crushed Olive : DPOLIVE
& Peacock Feathers : DPPEACOCK
Guipure Teardrop Lace : LACETEARCREAM
Cosmic Shimmer Olive Green Ribbon : KN16
Low Tack Tape : 3MTAPEMAG
3 Pearl Hat Pins : PINWHITE
Green Vintage Seam Ribbon : VRMOSS
Piercing Ruler : RULER
Self Adhesive Sticky Sheet : ADHA4
Micro Beads : MICROBEAD
Blending Mat : INKBLENDMAT2
Cut `n` Dry Foam : FOAMCUT & Cosmic Shimmer Clear Glue : CSGLUE
Grime Boss : GB30
Food Safe Mould , Cake Pop Sticks & Craft Knife
______________________________
Step by Step Instructions
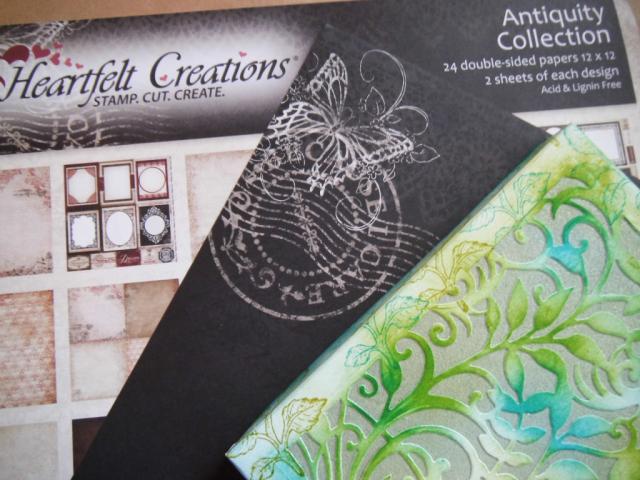
1 Now part 1 has been completed & you have the lid, it`s time to make the base so select a black piece of paper from a 12″ paper pad.
2 Often when making boxes it`s easy to make the lid up 1st & then knock of 3mm`s off the finished size to make the base. So for this lid the finished size is 13cms x 18cms. This measurement should be what everyone gets if they have made the box with the 2cm depth shown in part 1.
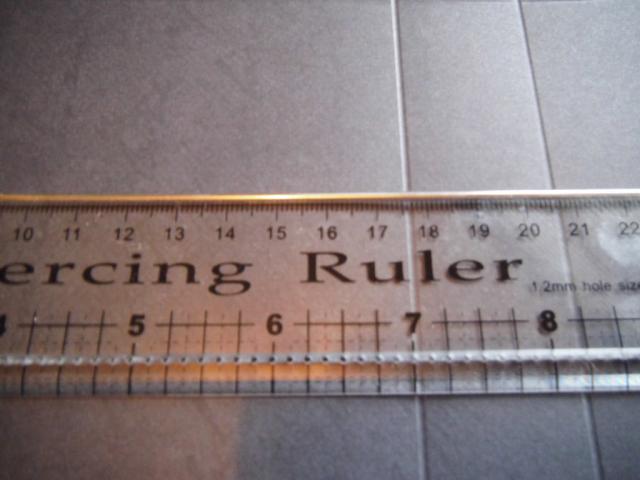
3 Now place the 12″ x 12″ black paper on a score board or use the piercing ruler to measure. This written paper shows the workings of the next measurements of 12.7cms as the 3mm has be taken off the 13cm lid measurement.
4 Score at 3cms & 6cms. Scoring on the top of the paper rather than the reverse.
5 From the last score line (6cm) measure 12.7cm & score at this point. Move the paper so the measurement falls into a score line before scoring.
6 Move the score line to 10cms & score at 13cms & 16cms or if measuring just 3cms & 6cms. This is just done on a whole number to make sure the measurement easy to see.
7 Turn the paper & score at 3cms & 6cms from the left hand side. Repeat the last 2 steps but this time measure 17.7cms.
8 Move the ruler or score line to 20cms & score at 23cms & 26cms ( or 3cms & 6 cms )by hand. Trim away the excess paper from the last score lines.
9 Cut the edges & corners in the same manner as the lid & follow the process to create the box base as a self lined box.
10 Cut a piece of paper to 17.2cms x 17cms using the beige paper with a pattern on.
11 From the left hand side measure & score at 4.5cms ~ 7cms ~ 9.5cms. This will make the dividing panel for the box. Move the measurements if a wider piece was needed but keep the scoring at 2.5cm tabs so it fits in the depth of the 3cms box base.
12 Now use the same distress inks & leaf stamp to decorate the liner of the box. Go in & distress the edges of the liner with the peacock feathers ink.
13 Turn the piece over & add a line of double side tape or use Cosmic Shimmer glue to the inner channel. Stick the piece together to make the solid divider so it doesn`t move out of place once in the box.
14 Add tape or glue to the bottom of the dividing panel & secure to the bottom of the base box.
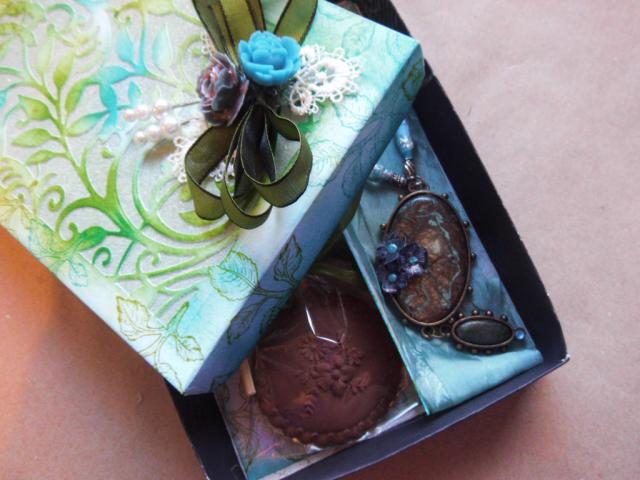
15 Add your gift to this section. In this case the UTEE necklace has been added.
Click here for this workshop
16 The workshop shows how to make the UTEE beads from a small piece of paper & they are very addictive & easy to make.
17 Please make sure there is no UTEE left on the lip or pan of the underneath unit as this pot will be tipped forward later on. Now for the chocolate lollipops. For this you will need the melt pot project pan & it will need to be one just used just for food. It`s great to have 2 pans, one for the UTEE & one for food.
18 Firstly lay the pan over the top of the melt pot. With both hands gently push the 2 flap areas either side of the melt pot pan down, they`ll clip into the melt pot with ease. If a problem just check one clip isn`t bend in & pull into place as this will fix the issue.
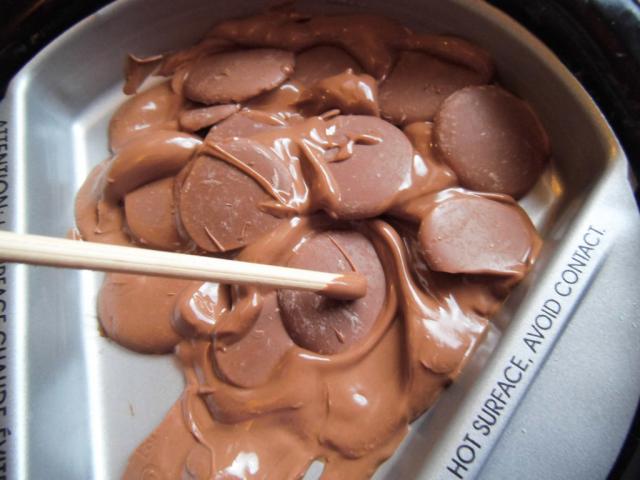
19 Turn the melt pot onto the UTEE high setting & place the chocolate into the pan. Don`t over fill the pan, here a good layer of 2 / 3 Cadburys giant chocolate buttons have been used. Other chocolates can be used but don`t over heat them is using ready standard chocolate bars.
20 As the project pan sits above the element in the melt pot the heat will be less but this is good for melting the chocolate. Use a wooden skewer to poke the buttons onto the base of the pan. Add a few more buttons if within the level of the project pan.
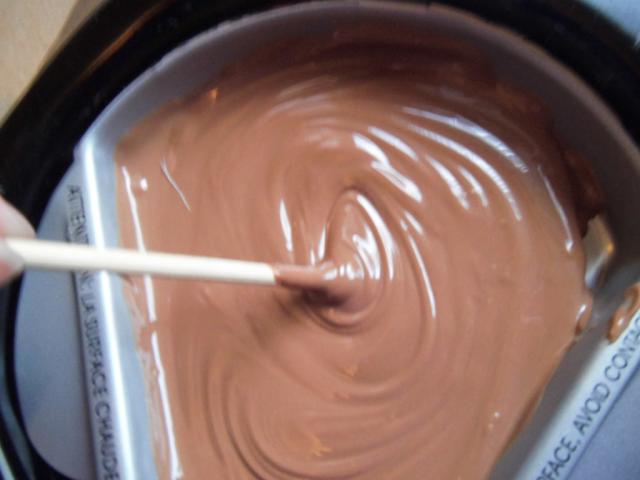
21 Stir the melted chocolate once it`s melted to make sure all the buttons have dissolved. Here nothing else has been added to thin the chocolate & don`t be tempted to as it could split the chocolate.
22 Lay the food safe moulds on a mat with a wooden or cakepop stick just laid half way in the mould. Tip the melt pot up so the chocolate fills into the mould. Don`t over fill the mould.
23 Set the chocolate moulds in the fridge or even 15 minutes only in the freezer.
Don`t forget that you can also make embellishments using the mold`n`pour (not food safe). Make the mould & then use then add UTTE to the mould for a lovely embellishment.
Click here for the Mold`n`Pour Workshop
24 Make 3 loops of the ribbon & tie it into a bow. Cut 3 sections off the teardrop lace & lay them under the bow. Now add 2 pearl pins & 2 flowers & glue everything in place. One is a UTEE rose & the other a resin flower.
25 Add the chocolates to a cellophane bag & tie with a piece of vintage seam ribbon. Don`t move the chocolate about in the bag as it will smear & make the cellophane cloudy.
25  26 So now the project is complete & ready for you to make the wonderful chocolate which were so easy using the project pan & just look at the flower detail.
27 Here is a nice flat view of the botanical lid of the box. The different shades of the blue & green inks work well together for a fresh look to any piece. They blend & tone so well together giving some lovely tones.
28 So a handy good size box which I’m sure you will keep reaching for when making dimensional cards or giving a gift. The expandable die is a very useful die to have in your collection.
28 29 Have fun creating this project, maybe change the colours to suit the person receiving it & tone in the gift ideas. Crafting is all about just having a go and seeing as the basics of this box is a piece of A4 card & a piece of 12″ x 12″ paper you have nothing much to lose.
___________________________________










Jewelry AND chocolate – what’s not to like? The finished project is beautiful Suzanne. However, I don’t think I will be making this for my step grand daughter (19 years old) because of what happened at Christmas. I thought I would share this with you as it is quite funny really. I gave her(amongst other lovely things) a handmade cracker filled with chocolates. It was beautifully decorated with ribbons and a hand painted reindeer with a red sparkly nose and took me well over an hour to complete. I thought she may like it as a keepsake for a tree decoration but before I realised what was happening she had taken out the chocs and screwed up the cracker like you would wring out a dishcloth! I didn’t say a word – wasn’t I good? But it is obvious that my efforts were not fully appreciated!!! Hope this made you laugh. X
Poor you but well done for keeping quiet about it, I know the feeling well ~ I once did a project which took a couple of days and I added some mulled wine packets in the draw, my friend loved it and I know she makes this every year so thought I`d go to town on it as she could bring it out every year. A month later I had the hitch fasteners handed back to me and she kindly said I saved these for you before recycling the box !!!! ~ I like you didn`t say anything but laughed when I needed these for a project and these were the only ones I had left at the time.
Thanks for the story ~ Suzanne x
Many thanks for your reply Suzanne – sorry it happened to you too. I’ve never really got into scrapbooking but I can see the point that at least you can keep your works of art rather than risk them being thrown out or destroyed! The point for both of us though is that it gave us pleasure to make and give and although I shall be more “selective” in future I shall continue to do it! XX